Clever District Sign Up: Step-by-Step Guide to “Get Clever” for Your Schools
Bringing Clever to your district is one of the fastest ways to simplify digital learning: one secure login for students and staff, automatic rostering from your SIS, and a clean portal that puts every app in one place.
This step-by-step guide walks district leaders through everything from pre-work to launch day and ongoing maintenance—so you can roll out Clever smoothly, confidently, and with minimal disruption.
Who This Guide Is For
- District IT leaders
- SIS/rostering admins
- Curriculum directors
- Data privacy officers
- School site tech leads
These roles will help evaluate, configure, and launch Clever successfully.
Rollout at a Glance (Typical Timeline)
- Week 0–1: Prepare and assemble your team, audit apps, gather data-privacy docs.
- Week 1–2: Create the district Clever account, connect your SIS, set sharing rules.
- Week 2–3: Configure SSO, brand the Clever Portal, connect your first apps.
- Week 3–4: Pilot at 1–3 schools, train staff, finalize communications.
- Week 4+: District-wide launch, monitor usage, provide support, iterate.
Step 1: Prepare Your Rollout (Foundation First)
- Name an owner and task force (IT lead, SIS admin, SSO admin, curriculum/apps lead, comms lead, school site champions).
- Inventory your digital ecosystem (student/staff apps, usage, rostering method, license counts, renewal dates).
- Clarify data-sharing boundaries (minimum data needed, district privacy requirements).
- Decide authentication approach (Google/Microsoft SSO, Clever Badges, or both).
Deliverables: App inventory, data-sharing policy, sign-in policy, named team.
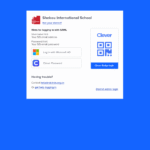
Step 2: Create Your District Clever Account
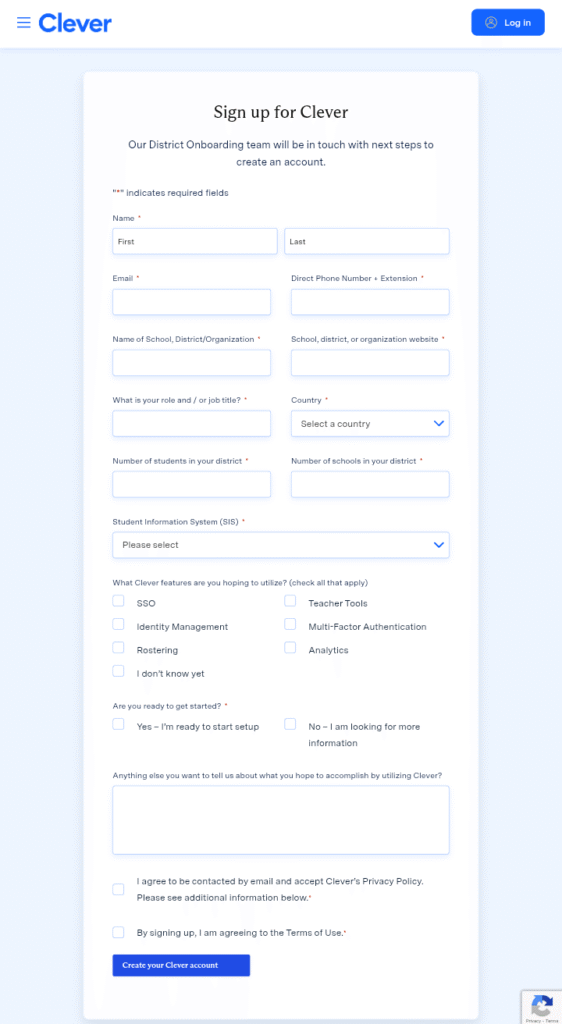
- Sign up as a district with a functional admin email (not personal).
- Enter district details: name, SIS type, student/school counts, contacts.
- Assign at least two admins with strong passwords and MFA.
Deliverables: District Clever account with two admins and complete contact info.
Step 3: Verify Your Identity and Domain
- Confirm district ownership via domain/email verification.
- Upload your district’s student data privacy policy; set defaults for app-sharing approvals.
Deliverables: Verified district profile and privacy defaults.
Step 4: Connect Your SIS and Configure Rostering
- Choose rostering method:
- Direct SIS sync (recommended)
- CSV upload (if no connector available)
- Map fields carefully (IDs, grades, terms).
- Scope sync to a subset of schools/grades.
- Run a dry sync and validate counts.
- Establish nightly syncs with clear error-handling roles.
Common Pitfalls: Duplicate IDs, inactive terms, orphaned students.
Deliverables: Clean roster data, successful SIS sync, documented schedule.
Step 5: Set Up Single Sign-On (SSO)
- Configure your IdP (Google Workspace or Microsoft Entra ID).
- Enable Clever Badges for K–2 (optional).
- Require MFA for district admins.
- Test student and teacher sign-in across devices and platforms.
Deliverables: Working SSO, optional Badges configured.
Step 6: Add Applications and Define Sharing Rules
- Connect core apps (LMS, literacy/math tools).
- Share minimal data required per app, per license.
- Map roles (teachers, co-teachers, specialists).
- Confirm app-level SSO opens seamlessly.
- Pilot permissions with a small teacher group.
Deliverables: First wave of apps connected with least-privilege sharing.
Step 7: Build and Brand Your Clever Portal
- Organize tiles by audience (students, teachers, staff).
- Apply district branding, rename tiles for clarity.
- Encourage teachers to add class-specific links.
Deliverables: A clean, branded portal that’s intuitive for each audience.
Step 8: Pilot at 1–3 Schools
- Select a diverse pilot group (elementary, middle, high).
- Run pilot checklist (logins, apps, rosters, Badges).
- Collect feedback through forms or channels, fix high-impact issues.
Deliverables: Pilot sign-off and improvements list.
Step 9: Train Staff and Finalize Communications
- Host short training sessions or record quick tutorials.
- Provide one-pagers by role (teachers, students, families).
- Prepare help desk scripts for common issues.
- Send launch emails to principals, teachers, families.
Deliverables: Training materials, help desk playbook, scheduled comms.
Step 10: Launch Day Checklist
- Confirm overnight SIS sync succeeded.
- Verify SSO for student and teacher accounts.
- Spot-check apps from the Portal.
- Staff help desk and make support info visible.
- Post a “What’s new” banner for first week.
- Monitor and triage tickets quickly.
Deliverables: Smooth district-wide go-live.
Step 11: Support and Troubleshooting (Greatest Hits)
- Student can’t find an app: Check sharing rules, licenses, sync.
- Teacher missing a class: Verify SIS section, co-teacher roles.
- Badge won’t scan: Reprint, check browser permissions, confirm active account.
- SSO loop: Clear cache, check IdP and email/UPN mapping.
- Wrong school showing: Correct primary SIS enrollment, re-sync.
Tip: Maintain a runbook for consistent troubleshooting.
Step 12: Ongoing Maintenance and Improvement
- Review analytics monthly (app usage, stale tiles).
- Align data sharing with licenses.
- Manage new app onboarding with minimal sharing and pilots.
- Rotate admin access, enforce MFA, audit permissions.
- Plan end-of-year cycle (freeze changes, SIS rollover, validate syncs).
Deliverables: Operations calendar and clean yearly rollover.
Quick Templates
Teacher Launch Email (excerpt):
Subject: Welcome to Clever — Your One-Stop Portal
Hi team,
Starting [date], you’ll access core apps through Clever. Visit [portal URL] and sign in with your district account. Please:
- Confirm your classes in Clever.
- Launch [App A] and [App B] to verify rosters.
- Submit tickets with student ID/class if anything looks off.
Thanks,
[Instructional Tech Lead]
Family Note (excerpt):
Your student can log in at home by going to [portal URL] and choosing “Log in with [Google/Microsoft].” For K–2, we’ve enabled Clever Badges—please keep the badge safe. For help, contact [help desk email/phone].
Success Checklist (Print-Friendly)
- [ ] Team assigned
- [ ] App inventory complete
- [ ] District account created + 2 admins with MFA
- [ ] Domain verified + privacy defaults set
- [ ] SIS connected + validated sync
- [ ] SSO tested (staff/students)
- [ ] Badges enabled (if used)
- [ ] Core apps connected
- [ ] Portal branded
- [ ] Pilot completed
- [ ] Training delivered + help desk ready
- [ ] Launch comms sent
- [ ] Launch monitoring active
- [ ] Ongoing review + EOY plan in place
Final Tips from Districts That Nailed It
- Start small, scale fast.
- Share minimally by default.
- Assign clear owners per app.
- Automate early (SIS syncs, help desk).
- Keep the portal tidy.
With this plan, your district can “get Clever” without chaos: a secure, student-friendly login experience, accurate rosters, and a daily home base for teaching and learning.